
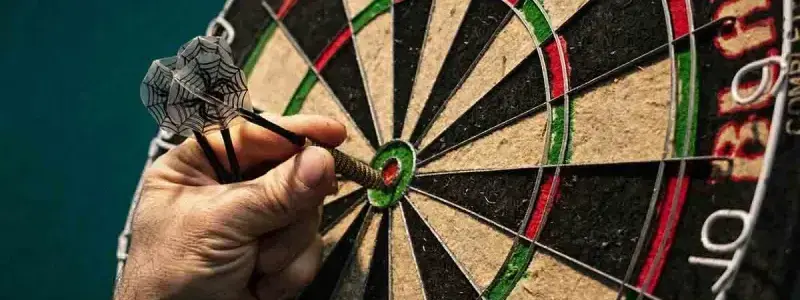
Out Charts: Never Do Checkout Math Again
Eighty-six left, three darts in your hand, and your opponent already parked on double 16 across the oche. You need a route before the first dart leaves your fingers — treble 18, double 16, done.
That route is what an out chart hands you. It's a pre-planned path from any finishable score down to zero, ending on a double.
What an Out Chart Is
An out chart (or checkout chart) lists a recommended dart combination for every score you can finish from — in a standard game, anything from 170 down to 2. The last dart must land in a double, because 501 rules say so.
The chart doesn't show the only way out. It shows a sensible way — usually the route that leaves the friendliest numbers when a dart misses.
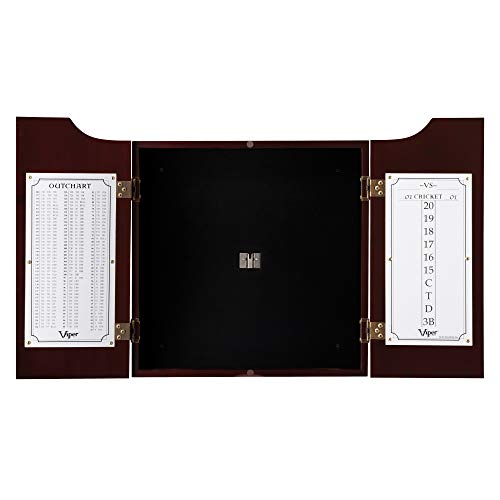
- Solid pine construction with box joints and bronze hinges is built to last
- Main compartment fits all official tournament-sized bristle dartboards
- Dry erase scoreboard and out-chart on the doors keep scoring close at hand
How to Read the Notation
T means treble, D means double, a plain number means the single, 25 is the outer bull, and Bull is the 50 (which counts as a double). So "T18, D16" reads treble 18, then double 16.
Read every route left to right as your throwing order. Order matters, because the whole point is what you're left on when a dart lands wrong.
Two-Dart Finishes: 61 to 100
Everything in this band is one setup dart — a treble or the 25 — then a double. Odd scores need an odd first dart, which is why the odd trebles carry this part of the chart.
| Score | Route | Score | Route |
|---|---|---|---|
| 100 | T20, D20 | 80 | T20, D10 |
| 99 | none — use T19, 10, D16 | 79 | T13, D20 |
| 98 | T20, D19 | 78 | T18, D12 |
| 97 | T19, D20 | 77 | T19, D10 |
| 96 | T20, D18 | 76 | T20, D8 |
| 95 | T19, D19 | 75 | T17, D12 |
| 94 | T18, D20 | 74 | T14, D16 |
| 93 | T19, D18 | 73 | T19, D8 |
| 92 | T20, D16 | 72 | T16, D12 |
| 91 | T17, D20 | 71 | T13, D16 |
| 90 | T18, D18 | 70 | T18, D8 |
| 89 | T19, D16 | 69 | T19, D6 |
| 88 | T16, D20 | 68 | T20, D4 |
| 87 | T17, D18 | 67 | T17, D8 |
| 86 | T18, D16 | 66 | T10, D18 |
| 85 | T15, D20 | 65 | T11, D16 |
| 84 | T20, D12 | 64 | T16, D8 |
| 83 | T17, D16 | 63 | T13, D12 |
| 82 | T14, D20 | 62 | T10, D16 |
| 81 | T19, D12 | 61 | T15, D8 or 25, D18 |
The oddball is 99: no two darts on the board finish it, so it's a three-dart route even from a perfect position. The skill here isn't memorizing pairs — it's steering setups toward the doubles you actually like.
The 101 to 110 Window
A handful of scores above 100 still fall in two darts, but only through the bullseye. Each one has a safer three-dart route if the bull isn't your friend.
| Score | Two darts | Three-dart route |
|---|---|---|
| 110 | T20, Bull | T20, 10, D20 |
| 109 | — | T20, 9, D20 |
| 108 | — | T20, 16, D16 |
| 107 | T19, Bull | T19, 10, D20 |
| 106 | — | T20, 6, D20 |
| 105 | — | T20, 5, D20 |
| 104 | T18, Bull | T18, 18, D16 |
| 103 | — | T19, 6, D20 |
| 102 | — | T20, 10, D16 |
| 101 | T17, Bull | T20, 9, D16 |
Three-Dart Finishes: 111 to 170
Scores up here need three good darts, and almost all of them lean on the treble 20. Seven scores can't be finished at all — the famous bogey numbers.
| Score | Route | Score | Route |
|---|---|---|---|
| 170 | T20, T20, Bull | 140 | T20, T20, D10 |
| 169 | bogey — no finish | 139 | T20, T13, D20 |
| 168 | bogey — no finish | 138 | T20, T18, D12 |
| 167 | T20, T19, Bull | 137 | T20, T19, D10 |
| 166 | bogey — no finish | 136 | T20, T20, D8 |
| 165 | bogey — no finish | 135 | T20, T17, D12 |
| 164 | T20, T18, Bull | 134 | T20, T14, D16 |
| 163 | bogey — no finish | 133 | T20, T19, D8 |
| 162 | bogey — no finish | 132 | T20, T16, D12 |
| 161 | T20, T17, Bull | 131 | T20, T13, D16 |
| 160 | T20, T20, D20 | 130 | T20, T18, D8 |
| 159 | bogey — no finish | 129 | T19, T16, D12 |
| 158 | T20, T20, D19 | 128 | T18, T14, D16 |
| 157 | T20, T19, D20 | 127 | T20, T17, D8 |
| 156 | T20, T20, D18 | 126 | T19, T19, D6 |
| 155 | T20, T19, D19 | 125 | T20, T15, D10 |
| 154 | T20, T18, D20 | 124 | T20, T16, D8 |
| 153 | T20, T19, D18 | 123 | T20, T13, D12 |
| 152 | T20, T20, D16 | 122 | T20, T14, D10 |
| 151 | T20, T17, D20 | 121 | T20, T15, D8 |
| 150 | T20, T18, D18 | 120 | T20, 20, D20 |
| 149 | T20, T19, D16 | 119 | T19, 12, Bull |
| 148 | T20, T16, D20 | 118 | T20, 18, D20 |
| 147 | T20, T17, D18 | 117 | T20, 17, D20 |
| 146 | T20, T18, D16 | 116 | T20, 16, D20 |
| 145 | T20, T15, D20 | 115 | T20, 15, D20 |
| 144 | T20, T20, D12 | 114 | T20, 14, D20 |
| 143 | T20, T17, D16 | 113 | T20, 13, D20 |
| 142 | T20, T14, D20 | 112 | T20, 20, D16 |
| 141 | T20, T19, D12 | 111 | T20, 19, D16 |
The ceiling is 170 — two treble 20s and the bull. From 120 down to 111, the middle dart is just a single that tidies the score onto tops or double 16.
Under 61: You Don't Need a Chart
From 60 to 41, it's a single then a double: 60 is single 20, double 20, and 56 is single 16, double 20 — or single 24, double 16 if that's your bed. No trebles required.
At 40 or below on an even number, throw straight at the double. On an odd number, kill it with a small single first — on 19, take single 3 to leave double 8.
Why the Routes Look the Way They Do
- Leave an even number. Even leaves give you a direct double; odd leaves burn an extra dart.
- Favor 32, 40, and 24. Miss double 16 into the single and you're on 16 — still one dart from home.
- Stay away from tiny leaves. Near double 1, anything over 2 busts the visit.
- Route through trebles you practice. A path through treble 17 is worthless if you never throw at it.
That's setup-shot logic baked into a chart: every dart should improve your position even when it misses.
Mistakes That Waste the Chart
The biggest is following a route blindly after a miss. If dart one changes the score, the old route is dead — recalculate before you throw again.
The second is chasing trebles when a single does the job; on 40 there's no treble in your future, so just throw at the double. The third is ignoring bust math — from 36, a single 18 is fine, but from 3, a single 2 leaves 1 and busts the visit.
Learning Outs Without Staring at the Wall
Start with the two-dart finishes from 40 down, because they come up constantly. Then learn your leave numbers: 32, 40, 24, and 36.
In practice games, call your route out loud before each visit. Saying "treble 20, double 16" builds the calculating habit that pressure tries to steal.
Do I need to memorize the whole chart?
No. Most players memorize finishes up to about 80 plus the big bull outs, then lean on leave logic for the rest.
Is there one correct out chart?
No — published charts disagree on plenty of scores, and pros customize routes around their favorite doubles. Any chart built on sound leave logic will serve you well.
Print the two-dart table, tape it by the board, and let your setup darts do the memorizing.